
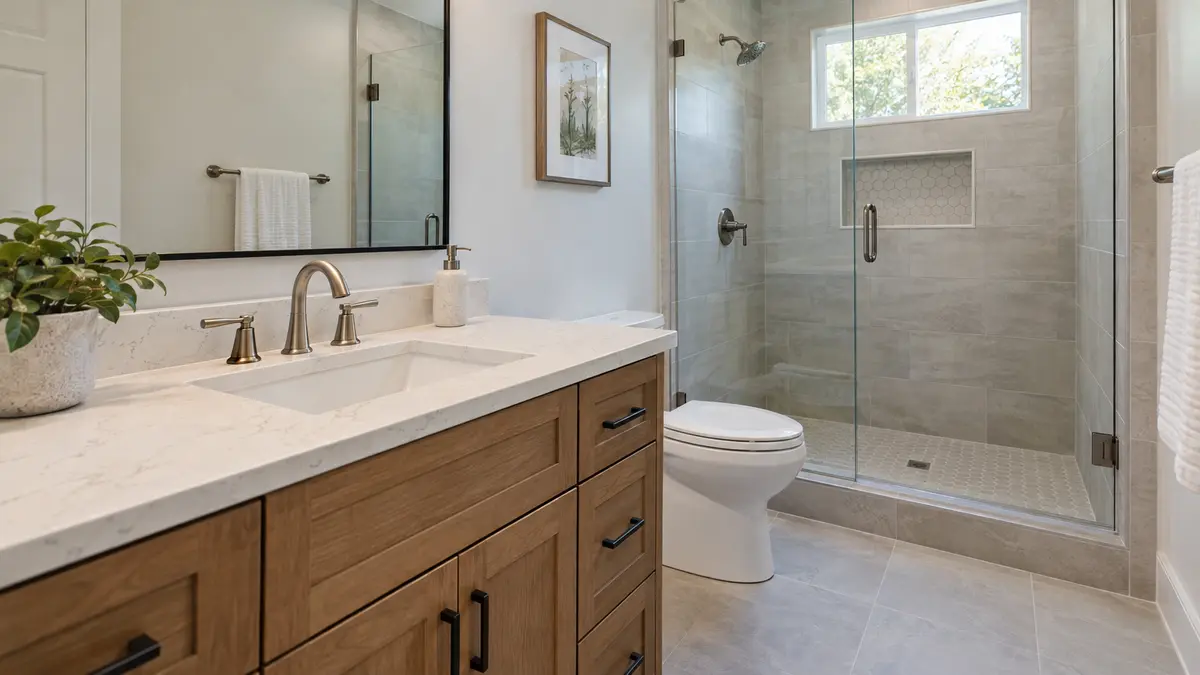
Planning a bathroom renovation is exciting, but one of the first questions homeowners ask is simple: how long does a bathroom remodel take? The answer depends on the size of the space, the scope of work, material availability, and whether any surprises are hiding behind the walls. Understanding each phase of the process helps you set realistic expectations, plan around the disruption, and make confident decisions along the way. Below, we walk through the typical stages of a bathroom remodel, from demolition to the final reveal.
What Affects a Bathroom Remodel Timeline?
No two bathrooms are exactly alike, so no two timelines are either. Several factors can shorten or extend the schedule:
- Project scope: A cosmetic refresh with new fixtures and paint moves much faster than a full gut renovation that changes the layout.
- Plumbing and electrical changes: Relocating a toilet, shower, or vanity requires additional rough-in work and often inspections.
- Material selection and lead times: Custom vanities, specialty tile, and made-to-order glass enclosures can take weeks to arrive.
- Permits and inspections: Local requirements vary, and inspection scheduling can affect when the next phase begins.
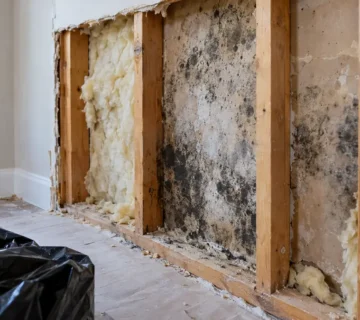
- Hidden conditions: Water damage, mold, or outdated wiring discovered during demolition must be addressed before work continues.
As a general industry guideline, a simple bathroom update may take a week or two, while a full remodel often takes several weeks. Your specific timeline should always be confirmed during the planning stage based on your project’s details.
Step-by-Step: The Bathroom Remodel Process
1. Planning and Design
Every successful remodel starts before the first tile comes off the wall. During this phase, you will define your goals, budget, layout, and style. This is also when fixtures, finishes, and materials are selected. Making decisions early is one of the most effective ways to keep the project on schedule, since changes made mid-construction can cause delays.
2. Ordering Materials
Once selections are finalized, materials are ordered. Ideally, key items such as the vanity, tub, shower fixtures, and tile are on hand or scheduled for delivery before demolition begins. This helps prevent the bathroom from sitting unfinished while waiting on a backordered part.
3. Demolition
Demolition is usually one of the quickest phases. Old fixtures, flooring, tile, drywall, and cabinetry are removed, and debris is cleared from the site. Surrounding areas of your home should be protected to minimize dust and disruption. This stage often reveals the true condition of the subfloor, framing, and plumbing.
4. Addressing Structural Repairs
If demolition uncovers rot, water damage, or other issues, they need to be corrected before moving forward. While this step can add time, it is essential for the long-term durability and safety of your new bathroom.
5. Plumbing and Electrical Rough-In
Next comes the behind-the-walls work. Plumbing lines are installed or relocated for sinks, showers, tubs, and toilets. Electrical wiring is updated for lighting, outlets, exhaust fans, and features like heated floors. Depending on your local requirements, an inspection may be needed before walls are closed up.
6. Walls, Waterproofing, and Insulation
With rough-in complete, new drywall or cement board is installed. Wet areas such as showers receive proper waterproofing, which is one of the most important steps in preventing future moisture problems. Drywall is then taped, mudded, and sanded, which can require drying time between coats.
7. Tile and Flooring
Tile work is often the most time-intensive part of a bathroom remodel. Floors, shower walls, and backsplashes are carefully laid, and grout is applied once the setting material cures. Intricate patterns, small mosaics, and large-format tiles can all add time to this phase.
8. Cabinetry, Vanity, and Fixture Installation
Once tile and paint are complete, the space starts to come together. The vanity, countertop, sinks, toilet, faucets, showerheads, and lighting are installed. Mirrors, towel bars, and storage accessories are also added at this stage.
9. Glass, Trim, and Finishing Touches
Custom shower glass is often measured after tile is installed, which means it may be one of the last items completed. Trim, caulking, touch-up paint, and hardware finish off the room.
10. Final Walkthrough and Reveal
The final step is a thorough walkthrough to confirm everything works properly and meets your expectations. Any small adjustments are addressed, the space is cleaned, and your new bathroom is ready to enjoy.
Tips to Keep Your Remodel on Track
- Finalize selections early so materials are available when needed.
- Plan for an alternate bathroom if this is your only one, since access will be limited during construction.
- Build in flexibility for unexpected discoveries during demolition.
- Communicate openly with your contractor about questions or changes as soon as they arise.
Ready to Start Your Bathroom Transformation?
So, how long does a bathroom remodel take? The honest answer is that it depends on your goals, your space, and the choices you make along the way. With careful planning, clear communication, and an organized process, you can move from demolition to the final reveal with confidence and fewer surprises.
If you are ready to create a bathroom that fits your style and your daily routine, Lopez Chavarria Construction is here to help you explore your options. Contact us today to discuss your project and learn what a realistic timeline could look like for your bathroom remodel.

No comment