Installing ceramic tile can elevate any room with style and durability. However, a great tile job depends heavily on correct installation. Even small errors can lead to cracks, uneven surfaces, or costly repairs. Whether you’re a DIY homeowner or hiring a contractor, understanding what not to do can save time, money, and frustration in the long run.
Why Proper Installation Matters
Ceramic tile offers a beautiful, durable finish, but poor installation can undermine all your hard work. Cracked tiles, misaligned grout lines, or uneven surfaces not only look bad—they can also affect safety and resale value. Learning about common ceramic tile installation mistakes helps you avoid problems before they happen.
Mistake #1: Skipping Surface Preparation
Why It’s a Problem
Installing tile over an uneven or dirty surface leads to instability. Grout may crack, and tiles may not adhere properly. Even minor debris like dust or paint can weaken the bond between tile and adhesive, resulting in loose or shifting tiles over time.
How to Avoid It
Always clean and level the surface before tiling. Use a straightedge or level to check for dips or high points. Patch imperfections with appropriate compounds and let them cure. If you’re tiling over concrete, make sure it’s free from cracks or moisture problems.
Mistake #2: Using the Wrong Adhesive
Why It’s a Problem
Not all adhesives are suitable for every tile or surface. Choosing the wrong type can lead to weak bonds or tiles that shift after installation. Some adhesives are not made for humid environments or heavy traffic areas, which can cause early failure.
How to Avoid It
Always check the manufacturer’s recommendations. Use thin-set mortar for floors and mastic for walls, unless your tiles are particularly large. For wet areas like showers or backsplashes, opt for waterproof adhesive designed for high-moisture environments.
Mistake #3: Ignoring Tile Layout Planning
Why It’s a Problem
Improper layout can lead to awkward cuts, uneven lines, or visual imbalance. Without planning, you might end up with tiny slivers of tile at the edges or mismatched grout joints, which makes the whole space look amateur and poorly thought out.
How to Avoid It
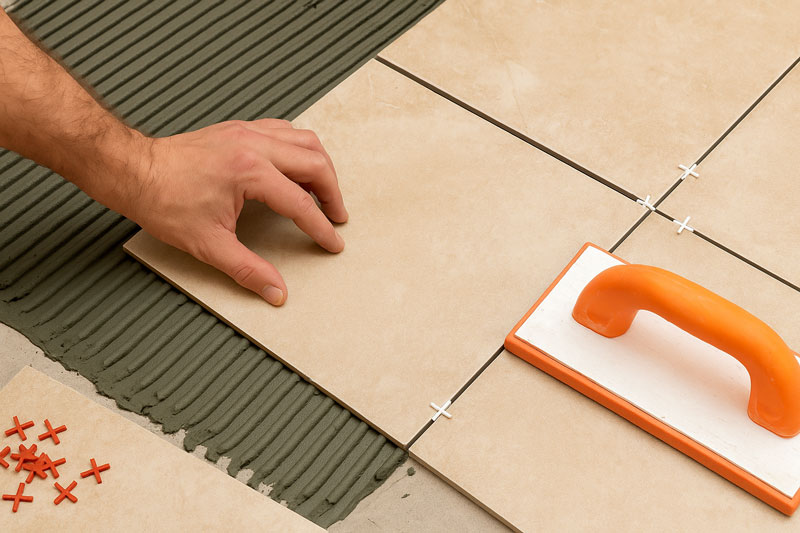
Dry-lay your tiles before applying adhesive. Start in the center and work your way out to balance cuts at the edges. Use tile spacers to maintain consistent grout lines. Measure twice before every cut and plan for high-visibility areas like doorways and corners.
Mistake #4: Incorrect Grouting Technique
Why It’s a Problem
Rushing the grouting step often results in messy lines, stained tiles, or cracks. Applying too much or too little grout, or using the wrong type, can compromise the durability and look of your tile job. Bad grouting also makes cleaning difficult.
How to Avoid It
Use a rubber float to apply grout evenly at a 45-degree angle. Press firmly so grout fills the joints completely. After a short set time, wipe excess with a damp sponge, rinsing often. Never leave grout haze for too long—it becomes harder to clean.
Mistake #5: Forgetting Expansion Joints
Why It’s a Problem
Tiles expand and contract with temperature and humidity changes. Without expansion joints, pressure builds and causes tiles to crack or lift, especially in large areas. This is a common issue in sunrooms, patios, or wide floor spaces.
How to Avoid It
Leave a small gap (typically 1/4 inch) between the tile and walls or other fixed surfaces. Fill these joints with flexible caulk instead of grout. For very large areas, consider using movement joints within the tile field, especially if sunlight or heat exposure is high.
Mistake #6: Walking on Tiles Too Soon
Why It’s a Problem
Tiles need time to set properly. Walking on them too early can shift them out of place, create unevenness, or ruin your grout lines. This mistake is more common during DIY jobs where excitement to finish overtakes patience.
How to Avoid It
Always follow adhesive and grout curing times. Most products require at least 24 hours before light foot traffic and 48–72 hours for full use. Block off the area if possible to prevent kids, pets, or furniture from disturbing the work.
Mistake #7: Not Sealing When Necessary
Why It’s a Problem
Some tiles and most grouts are porous. If left unsealed, they absorb moisture, dirt, and even bacteria. This can cause discoloration, mold growth, or early degradation—especially in bathrooms, kitchens, and outdoor areas.
How to Avoid It
Seal grout lines after installation if you’re using cement-based grout. Some natural stone tiles also need sealing. Reapply sealant every 1–2 years depending on wear. Choose a penetrating sealer for long-lasting protection and always test in a small area first.
Conclusion
Installing ceramic tile isn’t just about choosing the right color or pattern—it’s about execution. Avoiding these common ceramic tile installation mistakes will give your space a flawless, long-lasting finish. Whether you’re tackling a DIY project or hiring a professional, paying attention to the details makes all the difference.


No comment