Thinking of upgrading your floors or walls? Ceramic tile might be exactly what your space needs. It’s stylish, durable, easy to clean, and comes in more patterns and colors than you can imagine.
But here’s the deal: even the most beautiful tiles won’t look good if they’re poorly installed. So if you’re considering a tile project — or even planning to DIY — here are the most important tips to help you achieve that clean, professional finish that lasts.
Why Choose Ceramic Tile?
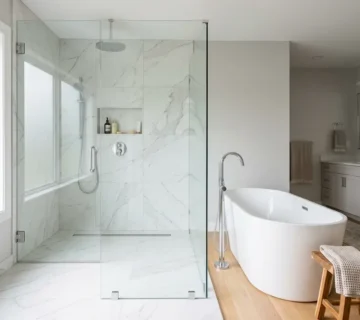
Ceramic tile is a favorite for homeowners and contractors alike. It works great in kitchens, bathrooms, entryways, and even living areas. Why? Because it’s:
- Water-resistant (perfect for splashes and spills)
- Stain-resistant (easy to clean!)
- Durable and scratch-proof
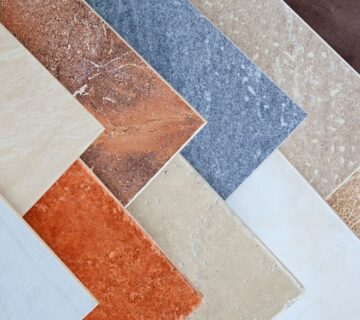
- Available in endless designs
- Ideal for both floors and walls
Whether you want a modern, rustic, or classic look — ceramic tile delivers.
Tip #1: Start with a Smooth and Level Surface
Before you even open a box of tile, you need to prepare the surface. If your subfloor or wall is uneven, you’re going to have problems.
- Remove old flooring or debris
- Repair any holes or cracks
- Make sure the surface is clean and dry
- Use a level to double-check the flatness
Why it matters: Uneven surfaces can cause lippage (where tiles stick out), uneven grout lines, or cracking down the road.
Tip #2: Choose the Right Type of Tile and Grout
Not all ceramic tiles are created equal. Some are meant for walls only, while others are rated for floor use. Also, grout types matter — sanded grout works best for larger gaps, while unsanded grout is perfect for small joints.
Pro tip: For high-moisture areas like showers, go for mold-resistant grout and waterproof tiles.
Tip #3: Plan Your Layout Before You Start
Dry-lay your tiles before using adhesive. This lets you see how the layout will look and ensures that you’re not stuck with tiny tile slivers along the edges.
- Use tile spacers to visualize grout lines
- Start from the center of the room or a focal point
- Work outward for symmetry
Pro tip: Take a photo of the dry layout to reference during installation.
Tip #4: Use the Right Tools for the Job
Tile installation isn’t a job for your basic toolbox. To get that clean, pro finish, make sure you have:
- Tile cutter or wet saw
- Notched trowel for adhesive
- Tile spacers
- Rubber grout float
- Level and measuring tape
- Mixing bucket and sponge
Pro tip: If you’re renting tools, get a short tutorial from the rental store — it’s worth it.
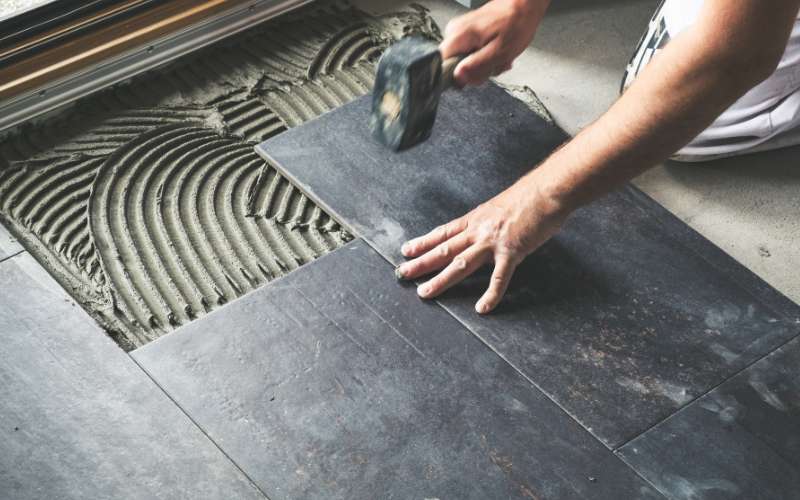
Tip #5: Don’t Rush the Process
Tile setting requires patience. Once you apply the thinset (tile adhesive), place the tile carefully and don’t press too hard. Let the tiles set for 24 hours before grouting.
When applying grout:
- Hold the rubber float at a 45-degree angle
- Press the grout into the joints
- Wipe away excess with a damp sponge
- Let it cure fully before walking on it or applying sealant
Tip #6: Seal and Maintain Your Tile
After installation, apply a sealer to protect both your tiles and grout from moisture and stains. This is especially important for kitchen backsplashes, showers, and bathroom floors.
To keep your ceramic tile looking its best:
- Sweep or vacuum regularly
- Mop with mild detergent
- Avoid harsh chemicals that damage grout
- Reseal grout once a year (or as needed)
Final Thoughts: Invest in Quality, Get Better Results
Ceramic tile installation is a project that pays off when done right. With careful prep, the right tools, and a little patience, you can create a space that’s both stunning and built to last.
Whether you’re hiring a professional or taking the DIY route, these tile installation tips will help you avoid costly mistakes and enjoy a flawless finish for years to come.

No comment